
Getting started part 2: Editing the Dink Example: Blood everywhere
For a quick overview of how the editor works, we'll go screw with things in the Dink example and eventually kill a lot of ducks.
Start the Dink Test example. (Run Novashell and choose the Dink Example from the list, or double click the file worlds/RT_DinkTest.novashell to start it directly.)
You'll see the "new, continue, edit" options. Click edit, or press F1 (editor toggle). Both put you in the "Editor mode".
Tip: You'll probably want to work in windowed mode when editing. To do this, hit Alt-Enter (or Command-F on the mac) to toggle.
Tip: Use Ctrl-F to toggle showing the frame rate
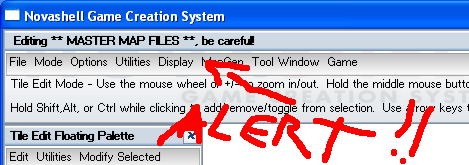
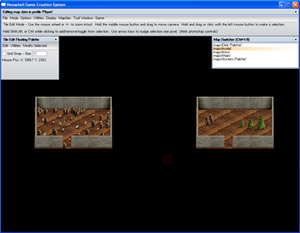
You'll see the main editor bar across the top and also some other editor windows pop-up. First, I want you to take a close look at the top. You should see "Editing ** MASTER MAP FILES **, be careful!".
This means instead of editing a saved game, you are editing the master data, so you need to be careful not to break anything.
Ok, restart the mod by choosing File->Restart Engine, or hitting Ctrl-Shift-R. This reloads everything, graphics, scripts, etc.
This time, click the "New" button.
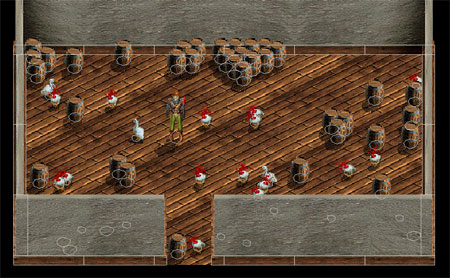
The game starts and you'll see Dink standing in a small room.

Now press F1 to toggle the editor mode.
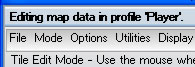
Notice the title of the main edit bar has changed. All map edits you do are now limited to THIS particular game - it's kind of like a safety net, you can erase or add all you want without it modifying the real source game data. (This is only applicable to games that choose to use the "profile" feature. If you don't care about a persistent world, you may always want to use the master data directly, some examples do it like this)
Tip: Under Options->Novashell System Preferences you can adjust how Novashell starts each time. You can add settings to the "command_line_parms" field like "-window MyGame.novashell". (This would make it start windowed and directly load that world)
The data for this profile (think of it as a saved game) is saved to <install dir>profiles/Player/RT_DinkTest, which is in itself, basically a mod of RT_DinkTest which is a mod of "Base".
You're probably wondering what the heck those green things are and where they came from. Those are pathfinding nodes.
The game automatically connects them together to construct a graph that the AI can use to navigate. To see how it's connecting them, select Display->Show Map Pathfinding Data.
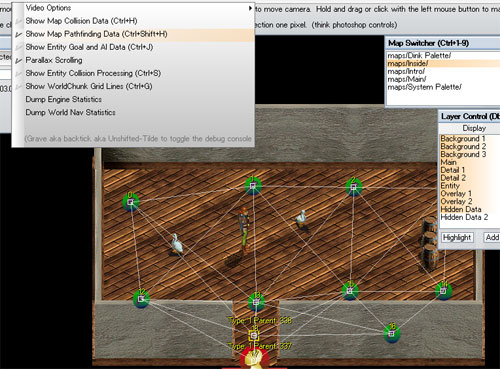
If you delete or add them, lines will connect or disconnect automatically, based on whether the paths can "see" each other or not.
Ok, we'll deal with that later, we don't care for now. Disable "Show Map Pathfinding Data" by clicking it again.
Layers
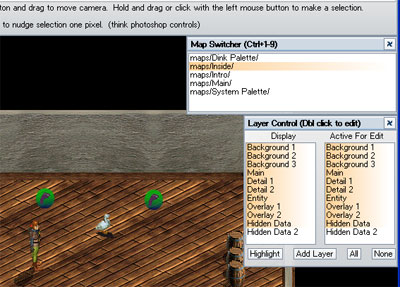
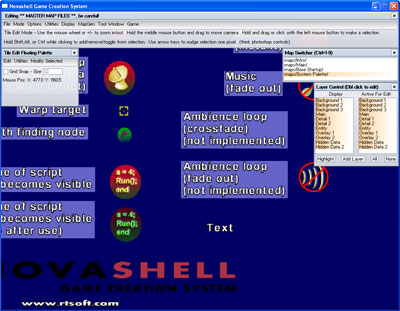
Look at the Layer Control panel on the right. Click Hidden Data 2 in the "Display" section.
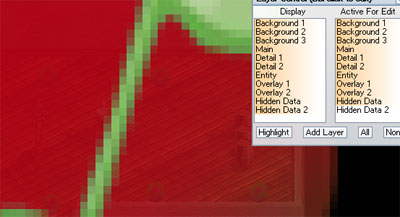
Woah, the level is obscured by a giant red note symbol!
This is an entity that controls music. When dink 'touches' its area, the new music will fade up, and any old music will fade down.
Let's say we want to scale it down to cover a smaller area. Click it. (Make sure it's also highlighted in the "Active For Edit" panel)
You should see a white rectangle surround it, indicating that it's selected.
Press Delete or Ctrl-X to erase it. It's gone. Or right click and choose Cut.
But I was kidding, we need that!
No problem, hit Ctrl-Z to undo. You can undo the last 20 selections or so. Each map keeps track of its own undo buffer.
With the music note still selected, press the [ (left bracket) key. You should see it scale down. Hold shift while clicking [ and it will scale faster. Use ] to scale up if it gets too small.
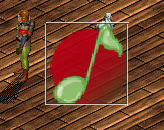
Get it down to about this size.
Now we want to move it to the upper left of the room, so music will only be triggered if Dink walks to that area.
You can left click and drag the icon to move it. However, for practice, let's use cut and paste. It's exactly like cutting and pasting with file explorer or text editing.
Right click and choose Cut from the pop-up context menu. This will remove it and place it in the copy buffer. You should see a small red outline following your mouse that shows it's in the copy buffer and where it will go when it is pasted.
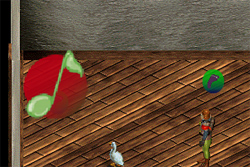
Paste it in the upper left part of the room by right clicking and choosing Paste.
Tip: If you don't like seeing the red outline of your copy buffer, you can Ctrl-D (deselect all) then Ctrl-C (copy nothing into your copy buffer) to clear it.
Tip: To perfectly align tiles, use the arrow keys to nudge it one pixel. Hold shift while nudging to move in larger increments.
Ok, now since the music is already playing we can't really test it, as music plays until another music starts or a "no music" icon is touched.
If you quit out of the game, everything will automatically be saved, and when you hit Continue, you'll start off right where you left off. Let's do that now.
It's faster to restart than totally exit and does the same thing, so hit Ctrl-Shift-R to restart, then choose the Continue option (if you click New, we'll lose all the changes we made!). Hey, we're back where we started.. and listen, no music has faded in this time!
Now walk over to the upper left of the room, the music should start as we touch the (now invisible) music icon.
Press F1 to go back into the editor. (We'll continue edit this saved game more, not the real data!)
What you need to know about Entities and Tile Pics
In Novashell, there are only two kinds of things you can directly manipulate. Tile Pics, and a kind of "Super Tile Pic" called a a "Tile Entity", or for short, just "Entity". Both are extended versions of a base type called "Tile".
Tile Pics:
- Take very little resources and space
- New ones can easily be made by cutting a section out of any other tile pic
- Supports X/Y flipping, color/alpha tinting, smart shadows, being a pathnode
- Supports collision, unlimited vector shapes, but all information is automatically shared with all other tiles of that exact bitmap and dimensions, you edit one, they call get changed
- Can't use physics or move on their own, can't run scripts
Tile Entities:
- Supports X/Y flipping, color/alpha tinting, smart shadows, being a pathnode
- Can be assigned a lua script, with its own entity-specific local namespace
- Can be assigned unique collision data
- Can be "named", meaning you can find it by name at any time, regardless of whether it or its map is loaded or not
- Can keep track of any amount of its own persistent data (automatically saved and loaded)
- Supports movement using the physics system
- Supports VisualProfiles (animations, direction systems)
- Supports BrainManager and GoalManager for AI
- Supports text labels
- Supports attached particle systems
That music icon thing is actually an entity with a lua script attached.
To access its properties to take a closer look at it go ahead and left click the music icon so a white border appears around it. Next, Right Click and choose Properties from the pop-up context menu. (Ctrl-E works too)
You'll see something like this:
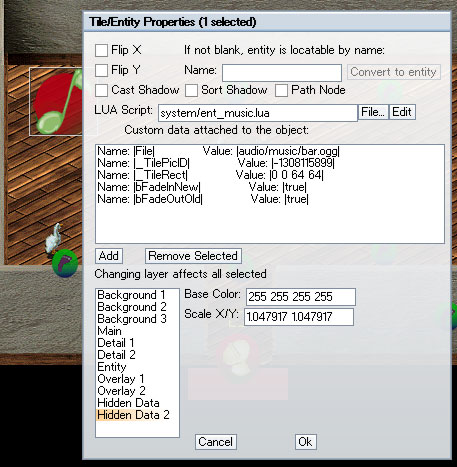
So what is all this stuff?
First, you can see the LUA Script is system/ent_music.lua. If you click Edit, it will attempt to open it with the associated editor. This particular script exists in the "base" directory, not our world's. If this exact script name DID exist in our worlds directory, it would override the one in the base.
Notice that the name is blank, this is fine, you should only name things that you want to find by name later.
Under custom data, double click the line with "Name: |File| ...", this is where you would set the music that loads. This data is saved with this particular entity and its script accesses the info.
Anything starting with an underscore like _TilePicID means it was created by the system and can probably be ignored. In this case, the two pieces of data tell the system which image to use.
The bFadeInNew and bFadeOutOld add additional music controls, the script put these as defaults.
The scale is a pretty weird number from us changing it. You can set it to "1 1" to remove all scaling. (Any number multiplied by 1 is the same number.)
There are no limits to the amount of custom data an entity can have attached, or how long each piece is.
Tip: When you click OK, all entities of that type on the active map are reinitialized, so you see the changes right away. Be aware you should restart to fully update all maps though.
Barrel punching: The sport
So now you know how to look at any entity and see what drives it, by looking at its custom data and reading its script, which hopefully has some info/instructions at the top.
Let's make more barrels. A problem you might have been noticing is it's easy to click the wrong thing, like floor tiles when you don't mean to. Let's make it easier by turning off the Hidden Data layers and making "Main" (that's where the floor tiles are) non-selectable.
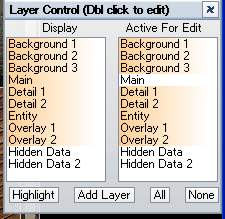
Set it up like in this picture. Now if you click-drag everything on the screen, only the walls and main objects are selected.
These layers are fully customizable by the way. If an entity is ever acting funny when you cut and paste it, check it's layer properties, the layer might have Parallax scrolling enabled. Double click a layer in the right panel to see its properties.
If you spend a while setting up a layer system you like, you can just cut and paste the layer.dat file from its maps directory into the directories of other maps.

Oh yeah, the barrels. Select a barrel and hit Ctrl-C for copy, then paste a few around the room. Then press F1 to toggle off the editor, and have Dink punch a few.
Hit F1 to go back in the editor. Select one of the destroyed barrels and bring up its properties.
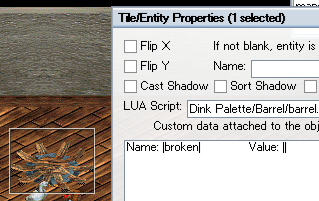
You'll see a custom data field called "broken" with a blank value.
This is something the script internally decided to save, and it checks this value when setting up the barrel to see if it's already destroyed or not.
Highlight the "broken" line and click the "Remove Selected" button, then press OK to close the properties dialog.
It's a miracle! The barrel is no longer broken!
If you examine a headless duck, it uses a similar system.
Tip: If you're annoyed by the red box following your mouse around, you can clear the copy buffer by hitting Ctrl-D (deselect all) and Ctrl-C (copy nothing into the copy buffer).
If you ask a duck to follow you, leave the game and come back, they will have forgotten. We could easily fix this by having the script store data here if we wanted.
There is a similar global "custom data" system that keeps information like the game age and version used to build it and any other global data you'd like to keep track of.
The coolest commands ever - Select Similar and Replace
Ok, copy the ducks like we did the barrels. Then exit out of editor mode by hitting "F1" and punch them until they're a bloody mess of headless mayhem. Now hit F1 again to re-enter the editor.
Let's say you hated the mess and wanted all the duck heads to turn into barrels.. Here is a quick way.
Activate the editor and select a barrel and hit Ctrl-C to put it in the copy buffer.
Next, select one duck head, then hit Ctrl-R. (or use Modify Selected->Select similar to current selection)
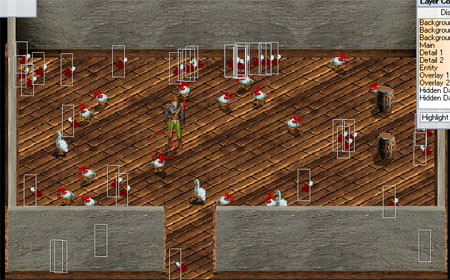
All the other duck heads will highlight too. Now choose Utilities->Replace each selected with what is in the copy buffer from the Tile Edit Floating Palette. All the duck heads turn into barrels. Toggle the editor off.
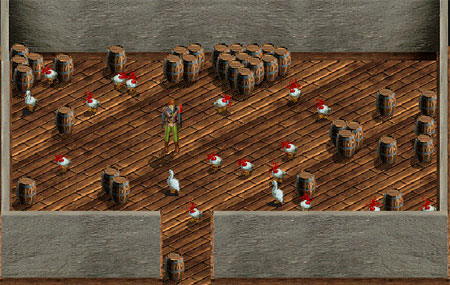
Notice that the barrels automatically push themselves apart due to their collision information.
If you enable Display->Show Map Collision Data (or hit Ctrl-Q) this will show where the collision is.
Tip: Toggle items in a selection with Ctrl+Left Mouse click.
Tip: Add items to an existing selection with Shift+Left Mouse Drag
Tip: Remove items from an existing selection with Alt+Left Mouse Drag
Tip: By holding down Ctrl, Shift, or Alt the editor will always let you 'drag out' a selection box instead of just highlight the thing you clicked.
Zoom and map Switching
Did you know there are actually two rooms in this map?
With the editor open, use your mouse wheel to zoom out until you see both rooms. Click and drag using the MIDDLE mouse button to pan your view.
Tip: If you don't have a mouse wheel you can also hold down space while dragging with the left mouse button or use -/+ keys to zoom
See the map switcher in the upper right? Click on "maps/Dink Palette" to edit the outside area. The view is remembered so you can switch back and forth between maps without losing what you were doing.
The Dink Palette is a collection of the objects I used to make this level. In Novashell, standard maps are used as "virtual toolboxes" that you can organize in a way that suits your work style. For instance, you could have a "house templates" section with giant houses fully decorated with tables and chairs that you can cut and paste to maps with a single click. This can also include pathfinding data, music, creatures, anything you that you don't feel like hand-placing every time.
Switch to the "System Palette" map. All worlds have this map, because it's located in the "base" maps directory. It's a collection miscellaneous tools, we'll get into how they work later.
Open Options->Map Properties while the System Palette is chosen.
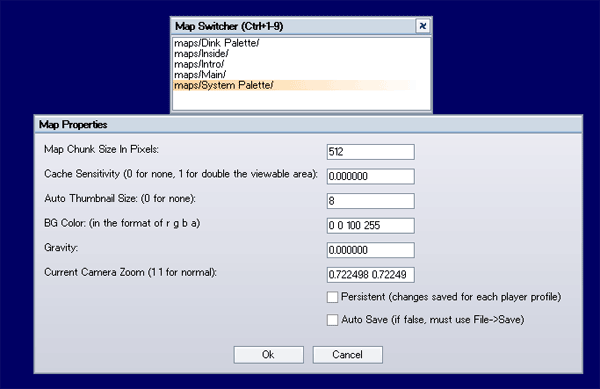
Notice that "Auto Save" is not checked. This is because you shouldn't change things on the System Palette, if you did, it would store its own copy in your world dir, and any changes in a newer Novashell couldn't be seen unless you deleted the System Palette map dir from your world.
The Intro map in the Dink world is also marked this way and requires File->Save Active Map Now to actually save it. The reason is we destroy it by moving the options after you click them, so we'd rather those changes not be saved.
By setting the current camera zoom to "1 1" you return to 1 to 1 pixel ratio.
© Copyright Seth A. Robinson and Robinson Technologies